SmartDongles have 32kb of storage that can be used for any purpose. One way to help secure your software product is by storing an executable function on the SmartDongle which is the run by your application. This helps to protect your application by storing part of the application right on the SmartDongle. Without the SmartDongle, your application cannot function!
This example will help walk you through the steps needed to do this using our example code and Microsoft Visual Studio 2008 SP1. Knowledge of C and Assembly language programming will help in understanding this walk-through.
In our example, a function that calculates the next prime number given a start point will be placed onto the SmartDongle. The source code can be downloaded here. This can be adapted to work for any self contained function. This will tell you how to compile the project with an assembly source listing so that you can calculate the number of bytes to place onto the SmartDongle.
Step 1: Load the project.
You can download the sample project here. Once you have extracted the WriteNext project, open the solution file in Visual Studio
The solution contains the function we will write to the SmartDongle, called GetNextPrime. Here is the source code to the function:
As you can see, the function is fairly simple, but a function of any complexity could be used in it’s place.
The main() function contains the code to write the function to the dongle. However, first we need to find out the size of the function, so we know how many bytes to write to the SmartDongle. The compiler provides the ability to dump an assembler code listing that will allow us to calculate the size of the function.
Step 2: Put solution into Release mode

It is very important that the solution is put into release mode. Compiling in debug mode adds a lot of code that is not needed and can cause problems when being run from the SmartDongle. Compiling in Release mode also optimizes the code and reduces it’s resulting size.
Step 3: Open the project Properties

Open the Properties for the project, the Property Pages window will appear
Step 4: Set Optimization to Minimize Size
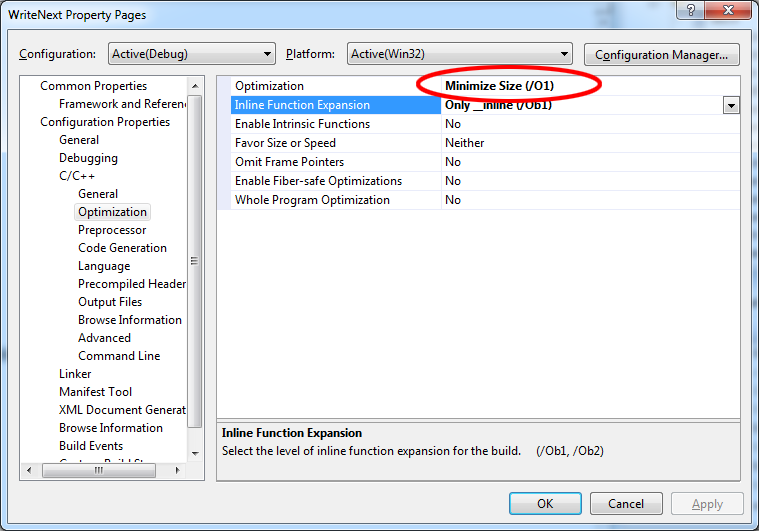
In Configuration Properties > C/C++ > Optimization, set Optimization to Minimize Size (/O1). This will reduce the compiled code size which helps reduce the amount of data needed to be stored on the SmartDongle
Step 5: Enable Assembly Code Listing Output
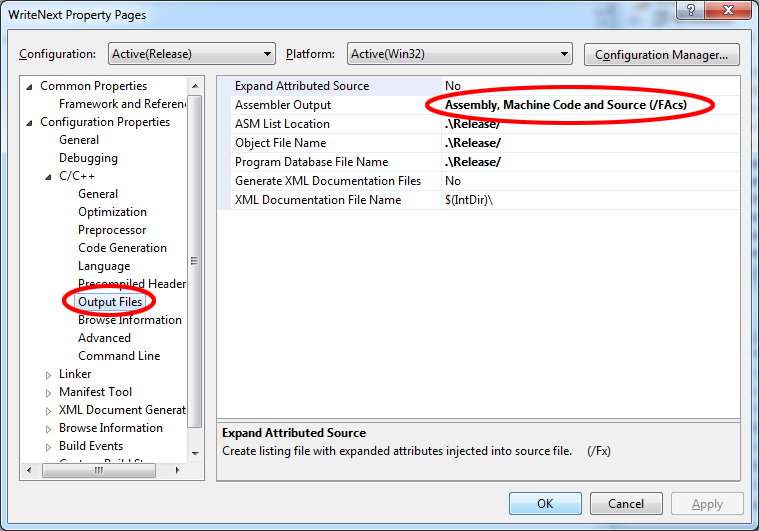
On the same screen, under Configuration Properties > C/C++ > Output Files, set the Assembler Output option to Assembly, Machine Code and Source (/FAcs). This will output a file with a .cod extension that contains the assembly code along with the machine code, machine code locations, and the C source code. This will help us determine how large the compiled function is.
Step 6: Compile the Solution
This step is easy, just rebuild the solution. This will create the .cod file we will use to calculate the size of the function.
Step 7: Open the .cod file
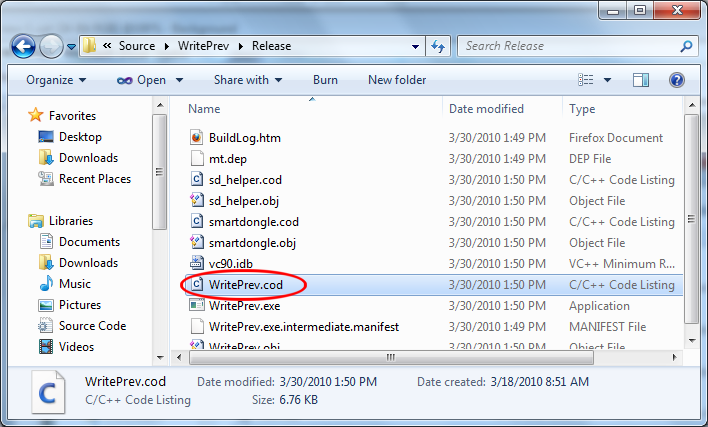
In the Release folder for the solution, you will find a file with a .cod extension. This should open in Visual Studio, but it is just plain text, so feel free to open it in your editor of choice.
Step 8: Find the function start location in the .cod file
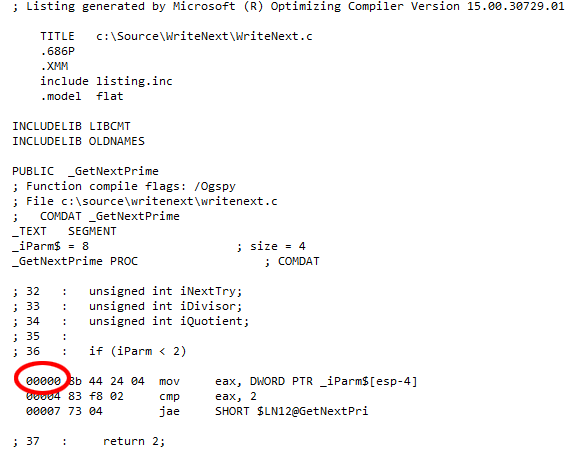
The image above shows a snippet from the .cod file. Here we see where the code for the GetNextPrime function starts. We can see that the first assembly code starts at hex address 00000. Now that we know this, we can search the file until we find the end of the function.
Step 9: Find the function end location in the .cod file
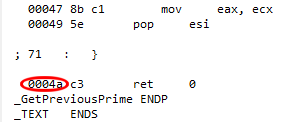
This image is a snippet from the .cod file that shows where the function ends. Since the code listing also includes the C code it is easier to find the ending of the function. This tells us that the function ends at hex address 0004a. We also see that the last instruction takes up one byte, indicated by the c3 after the address. This means we need to add one byte to get the last instruction of the function
Step 10: Calculate the size of the function
Now that we know the start and end locations of the function, we can calculate it’s size. To do this just subtract the start location from the end location. This will give you the size of the function in hex. Convert the hex to decimal and we know the size of the function in bytes. In this example the function starts at 00000 and ends at 0004a. 0004a – 00000 = 0004a, which is 74 decimal. Since we need to capture the last instruction we add one byte to that, so the function is 75 bytes in size.
Step 11: Writing the function to the SmartDongle
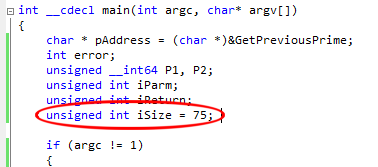
Now that we know the size of the function, we can write it to the SmartDongle. The image above shows the change that was made to the main() function to write the correct amount of code to the SmartDongle. This size will be different depending on the size of your function and the compiler used. Once you have the size set you can run the project to write the function to the SmartDongle.
Let’s take a closer look at the code that writes the function to the SmartDongle.
This code writes the length of the function to the first byte of the SmartDongle. This allows the program which reads the function to know how much data to read off of the SmartDongle
This code takes a pointer to the GetPreviosuPrime function and uses it as the source of data to Write to the SmartDongle, then it writes the function to the SmartDongle starting at the 4th byte, this gives you room for a 32 bit number to store the length of the function
Congratulations! You now have a function stored on the SmartDongle that can be read and run from memory! Please check out the next walk-through in this series where we show you how to read the stored function and use it. You can find it here.


